

How To Add Usb Drivers To Windows 7 Iso
How to Install Windows 7 through USB 3.0 port?
You are here: Tutorials > How to Install Windows 7 through USB 3.0 port?
When installing Windows 7 through USB drive on new skylake system, y'all may receive the following error message,
"A required CD/DVD drive device driver is missing. If you have a driver floppy disk, CD, DVD, or USB wink drive, please insert information technology now. "
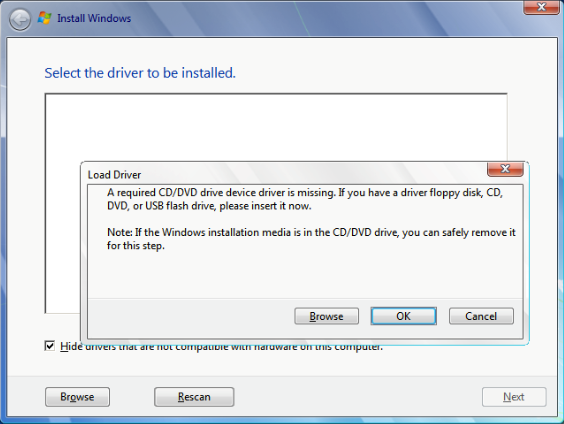
In such case, the installation can't go on. The problem is caused by a missing USB three.0 commuter in the Windows 7 installation package. The Windows 7 installation program doesn't recognize the new USB 3.0 port, hence we need patch the driver to the installation package. Please follow the steps,
Pace i - Create Windows vii bootable USB drive from Windows 7 ISO file
You lot can observe the item procedure here. Allow's assume the USB drive has the bulldoze letter H: later you accept created Windows 7 bootable USB drive successfully.
Step 2 - Download and unpack Intel(R) USB three.0 eXtensible Host Controller Commuter
Y'all may download information technology from https://downloadcenter.intel.com/production/65855 .
There are two nil files for the driver. Just unzip them to a local folder, with different sub binder for each file, for case, C:\USB3\driver1, and C:\USB3\driver2.
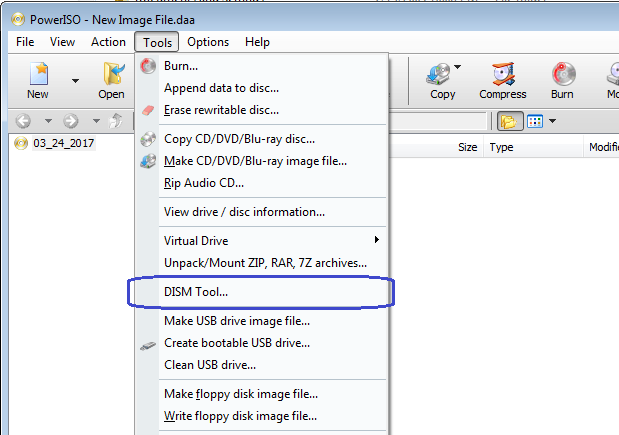
Step 3 - Run PowerISO DISM Tool
Run PowerISO, and select the menu, "Tools --> DISM Tool". On Windows vista or above Windows operating systems, y'all will need ostend UAC dialog to continue.
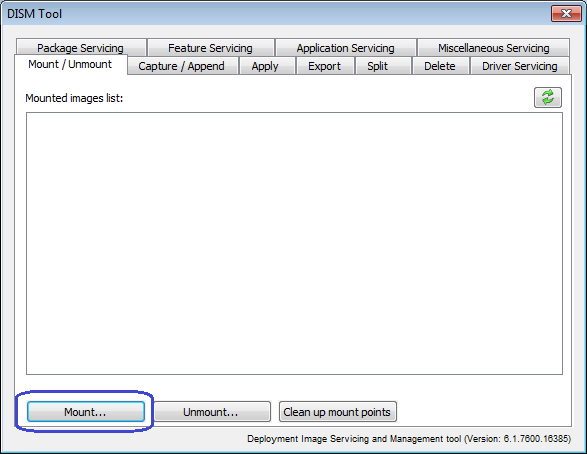
Step 4 - Mount WIM file in the USB bulldoze
In "DISM Tool" dialog, select "Mount / Unmount" page, and click the button "Mountain...".
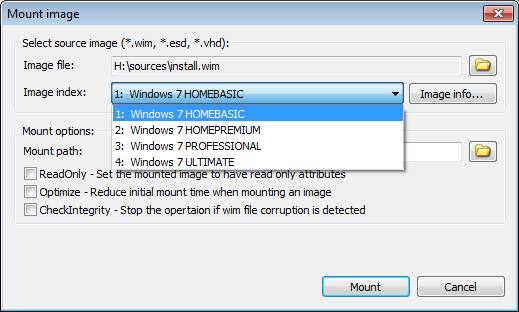
The "Mount image" dialog will popup. Click "Browse" push button to select the kick WIM file in USB drive, for example, H:\sources\boot.wim.
Select the image index from the list, ordinarily, information technology should be "ii: Microsoft Windows Setup (x64)" for 64-bit Windows 7 ISO file, or "2: Microsoft Windows Setup (x86)" for 32-bit Windows 7 ISO file.
Create an empty binder, for example, C:\mountain, and select it for the mount path.
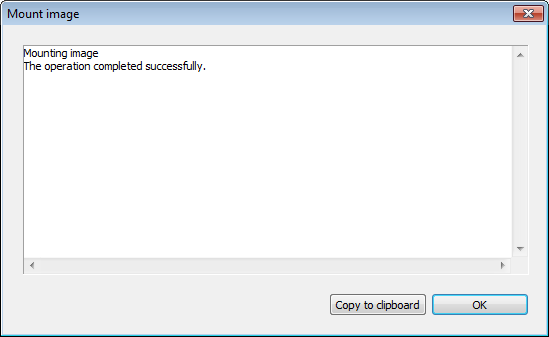
Click "Mount" to mount the prototype in WIM file to the specified path.
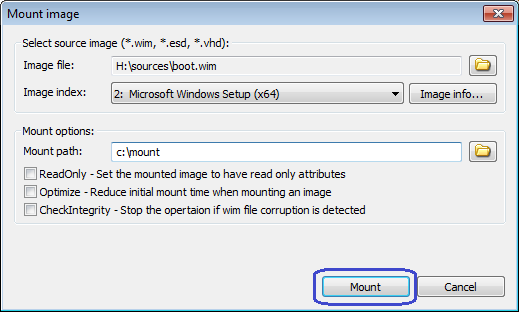
You should get the message, "The operation completed successfully" afterward the image has been successfully mounted to the specified the path. Click "OK" to shut the bulletin box.
Step 5 - Patch drivers into the image
Select "Driver Servicing" page, and select "C:\mount" from the mounted directories list.
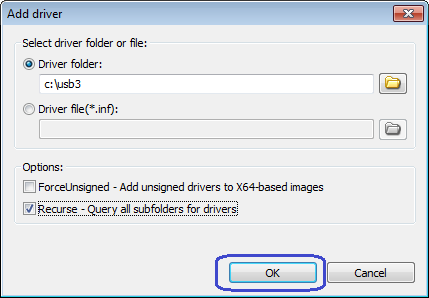
Click "Add together driver..." button.

The "Add driver" dialog will popup. Select "C:\usb3" for the driver folder, and check the option, "Recurse - Query all subfolders for drives".
Click "OK" to add the drivers to the prototype.
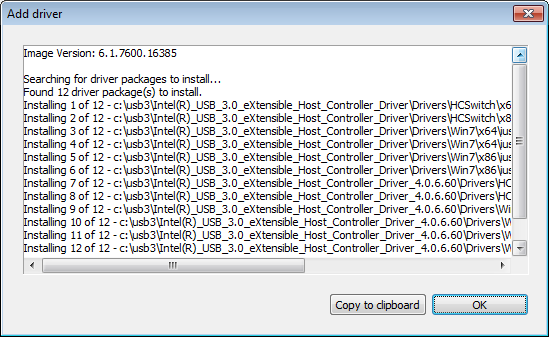
You lot should run into the message similar below after the performance completes. Click "OK" to shut the bulletin box.
Footstep vi - Unmount WIM file
Select "Mount / Unmount" page, and select "C:\mount" from the images list.
Click "Unmount" button.

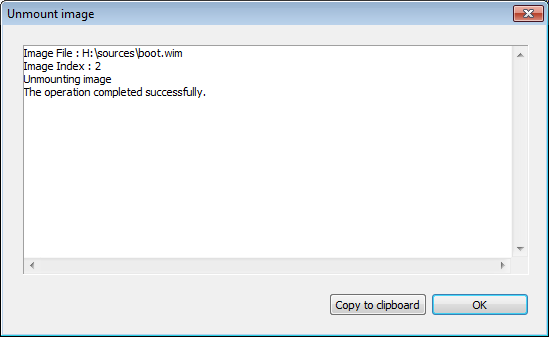
The "Unmount paradigm" dialog will popup. Make sure the unmount path is "C:\mount", and check the option, "Commit - Save the changes when unmounting image file". Click "Unmount" to unmount the epitome.

You should get the message below after the operation completed successfully.
Yous might receive the error message below when unmounting the prototype,
The directory could not be completely unmounted. This is usually due to applications that notwithstanding accept files opened within the mount directory. Close these files and unmount again to complete the unmount procedure.
In such instance, please close all programs which might open the files in mounted directory, especially shut all Explorer Windows, and so effort unmounting the paradigm again.
Step 7 - Patch drivers to install.wim
Repeat step iv to step 6 to patch drives to install.wim. Usually install.wim can be found in the sources folder, for example, the full path name looks similar H:\sources\install.wim.
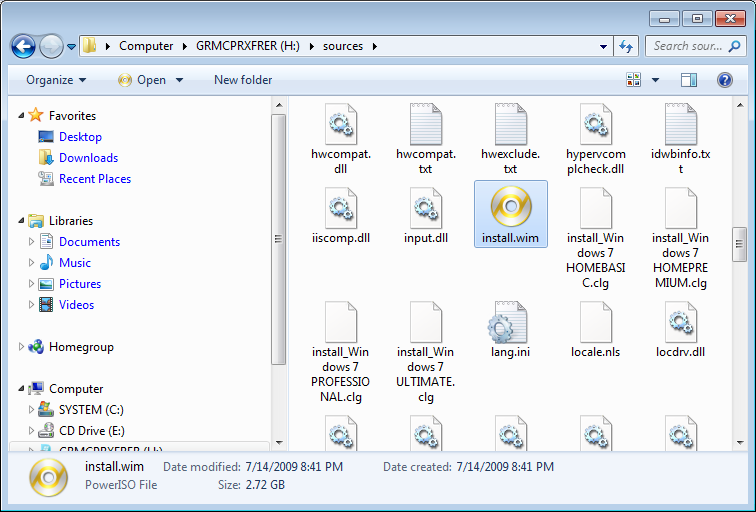
If there are several images in install.wim, y'all demand select the correct image to patch. If you are not sure which prototype should be patched, you can patch all images in install.wim (repeat footstep 4 to step half-dozen for each image in the wim file).
Step 8 - Install Windows 7 from the patched USB bulldoze
You take patched the USB three.0 driver to Windows seven installation package successfully. You can now apply information technology to install Windows 7 from the USB 3.0 port, which is present in most new skylake computers. Please also brand sure that the BIOS is properly configured for booting from the USB device.
Copyright 2004-2022 Power Software Ltd. All rights reserved.
Source: https://www.poweriso.com/tutorials/install-windows-7-from-usb-3.0-port.htm
Posted by: bustostholdrie1970.blogspot.com
0 Response to "How To Add Usb Drivers To Windows 7 Iso"
Post a Comment